Create Elastic Job agent resource in Azure
Follow the steps below to create elastic jobs in Azure:
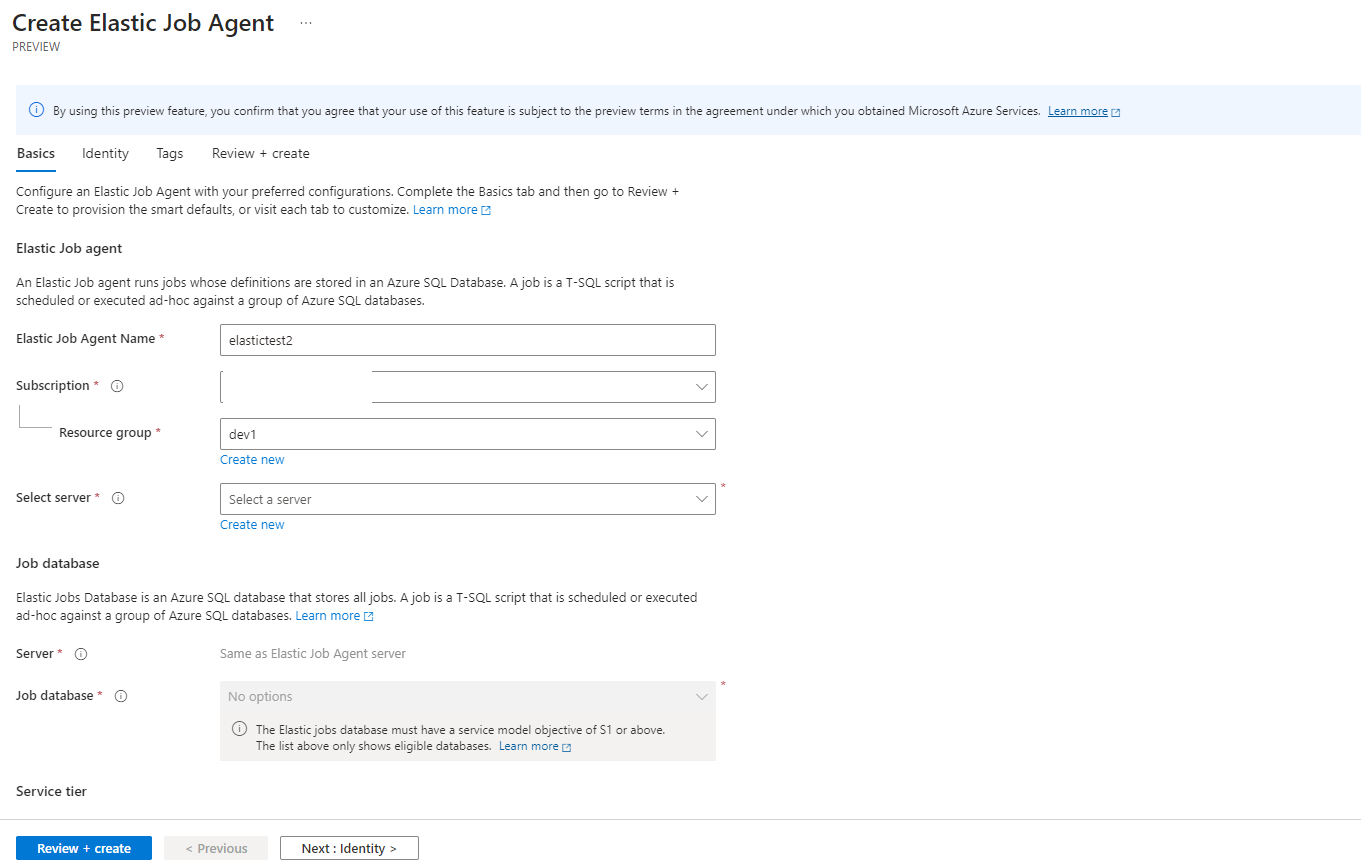
Select Azure Elastic Jobs resource in Azure portal:
- Open the Azure portal and search for Azure Elastic Jobs:
- Define a unique Elastic Job agent name.
-
Select the Subscription and Resource group.

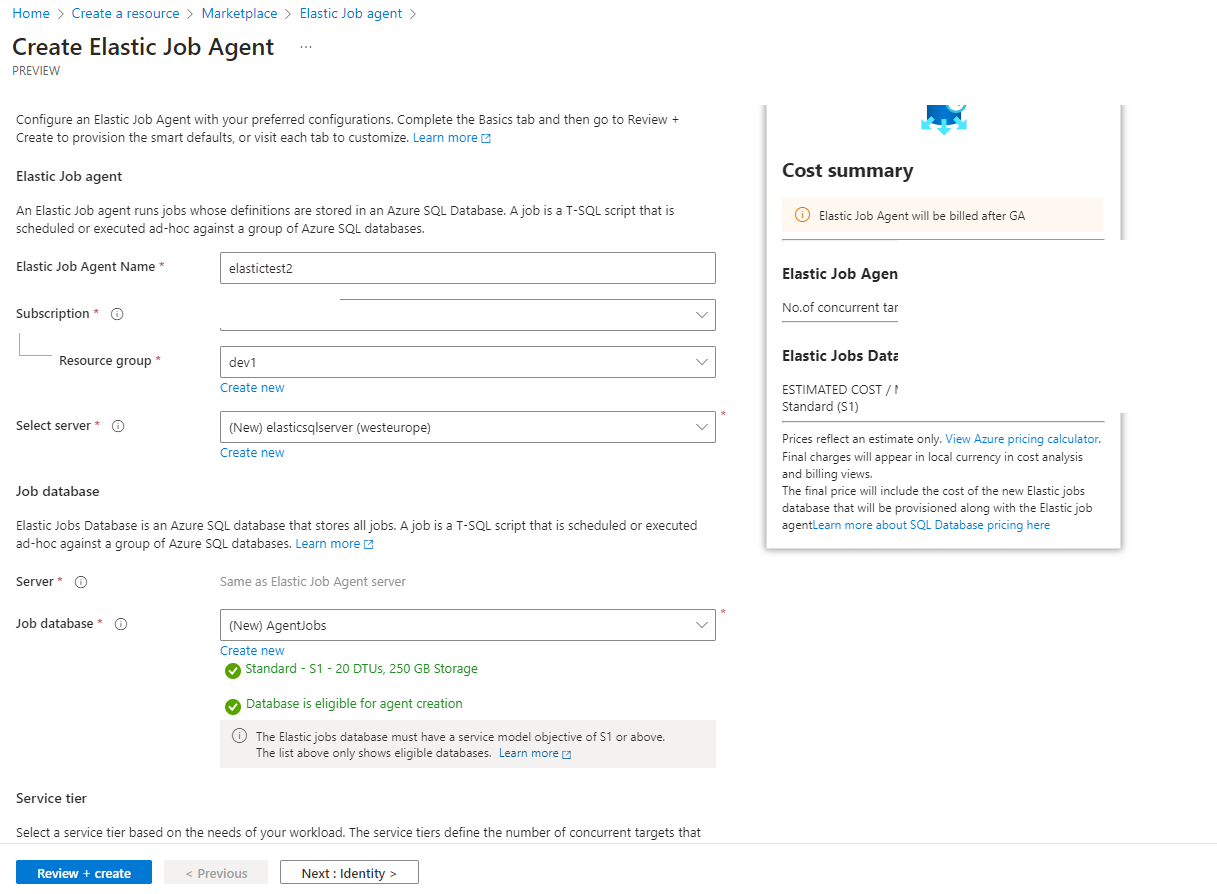
Configure the Elastic Job agent:
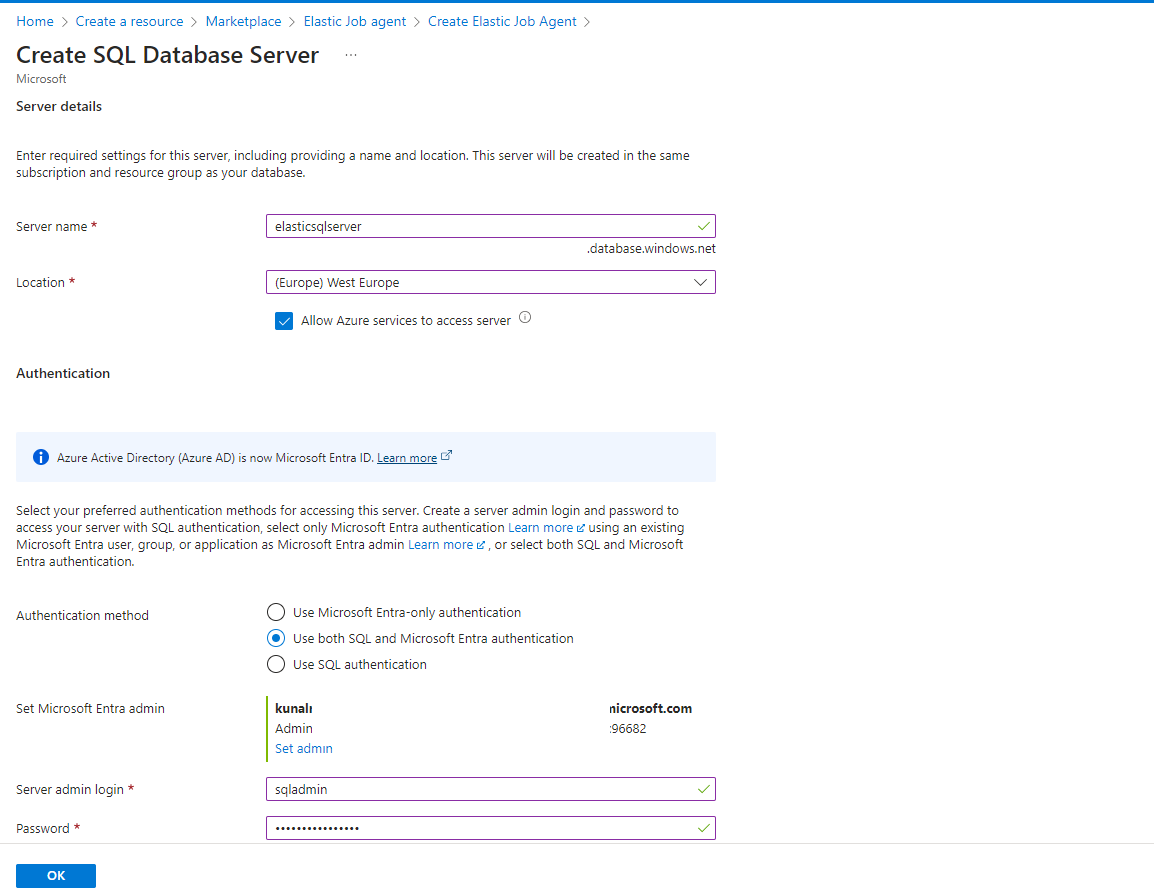
- Choose the Azure SQL Database server and Job database.
- Select the Service tier for the Job database (S1 or above).
- Optional settings:
- Configure Managed identity and Tags.
- Enable Geo-redundancy for regional failover (optional, increases cost).
- Choose the Storage redundancy level (LRS, GRS, GZRS).

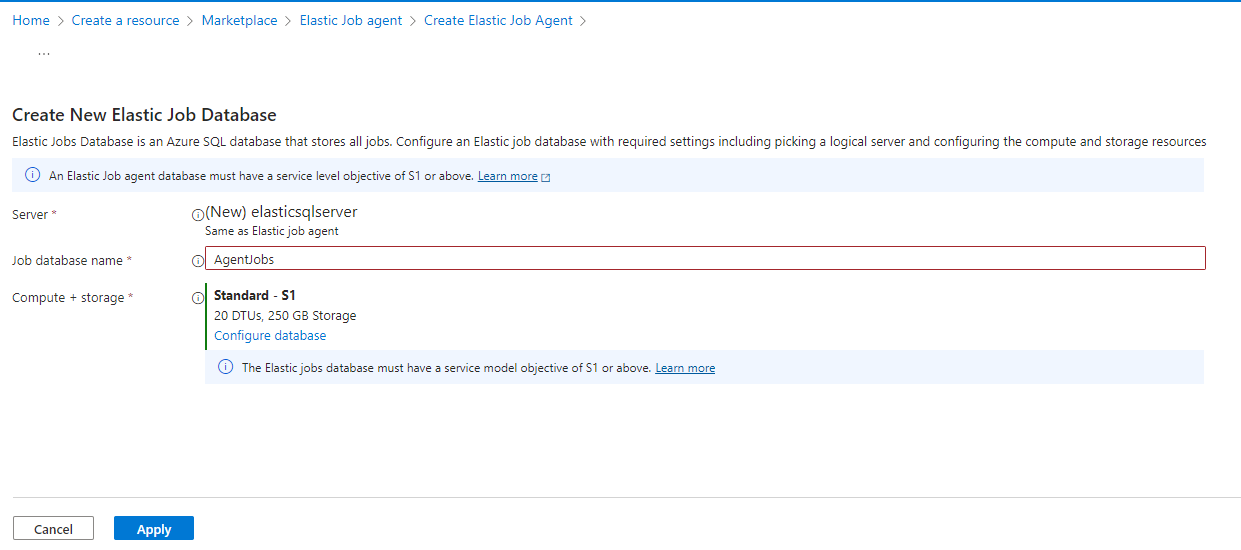
Create a new job database:
- Define the Job database name.
- Choose the Compute + storage tier (default: Standard - S1).
- Optional settings:
- Configure database for further customization (service tier, backup, threat protection).

Review and create:
- Review the summary of your chosen configurations.
- Click Review + create to provision the Elastic Job Agent.
-
Optionally use Previous to edit earlier settings.
